Would like more content out of your Facebook Live Videos? Creating content is time-consuming so make sure you leverage the content you are creating! In this post, I’ll show you 3 ways you can repurpose your Facebook Live videos to create more content.
Why Use Facebook Live?
First of all – why are we doing this? The biggest reason is that Facebook Live is getting great organic reach and lots of engagement in the Facebook News Feed. As Pages struggle for any organic reach, this content is being pushed farther by Facebook.
The main reasons to do Facebook Live are:
- More organic reach on Facebook
- Brand yourself as an expert
- Easily create content
And I outline the reasons a little more in this video.
#1 Download the Video from Facebook and Upload to YouTube
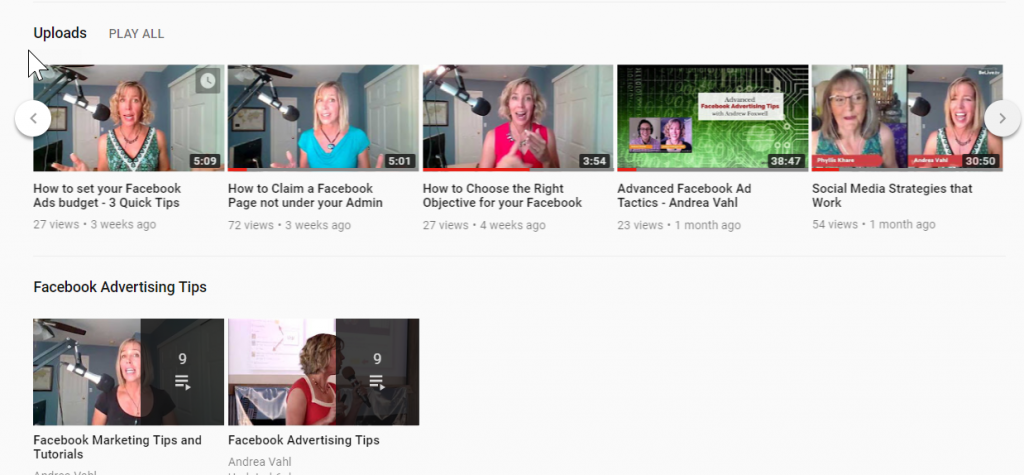
The first way to repurpose your Facebook Live is to download it from Facebook and upload it to YouTube so the video gets more visiblity.
When people ask me if you should be doing videos on Facebook or YouTube, my answer is – both. You have to have the video on Facebook for Facebook (if you share a YouTube video on Facebook, it will get very little reach because Facebook is trying to take over YouTube).
Then you have to have the video on YouTube for search – YouTube videos come up better in Google search (since Google owns YouTube).
YouTube Videos are also more “shareable” on LinkedIn and Twitter because they will have the controls to play the videos there.
If you are going to do that, you may want to consider how you do your Facebook Live videos. I generally keep my video very focused with a couple of quick tips or a very specific purpose for the video that people will find useful later.
For Facebook Live videos that I know I’m going to post to YouTube, I don’t generally interact with questions or messages on the comment section that people on YouTube won’t be able to see. If I do want to answer questions, I read the question again for the benefit of anyone watching the replay.
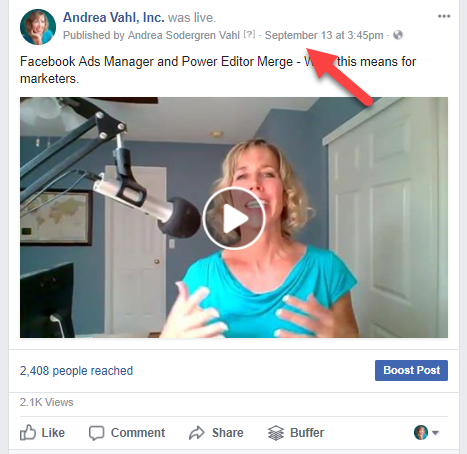
The download button is a little hidden on videos. First you click on the Date of the post.
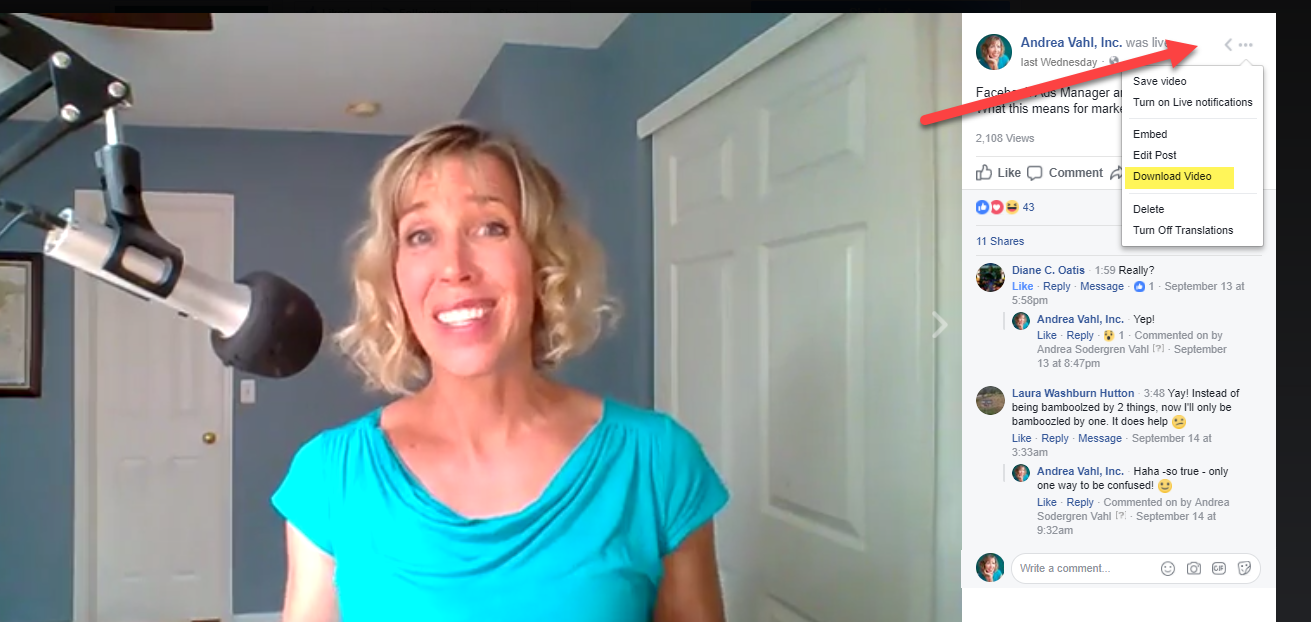
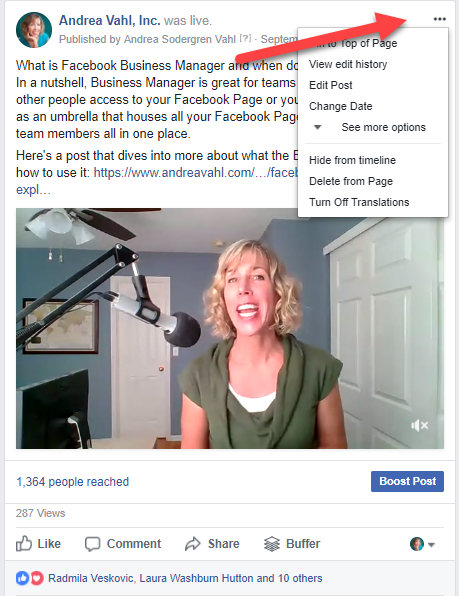
Then you select the 3 dots that give you a dropdown menu and then you can select Download Video.
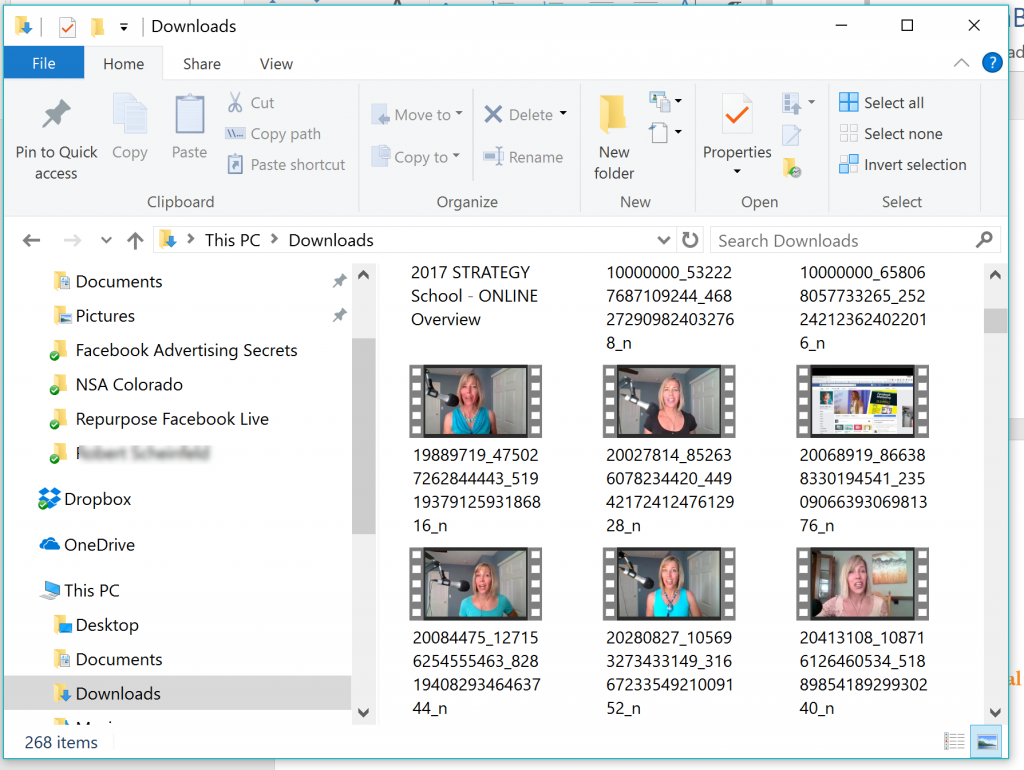
The file will then be in your Downloads folder with a big long string of numbers. You will upload that into YouTube and adjust the title, description and keywords as necessary.
Now you can add these videos to Playlists on YouTube and use them to post on Twitter and LinkedIn.
#2 Embed the Video in a Blog Post
Now that you have them on YouTube, you can embed them in a blog post. Like I’ve done above.
Technically you can embed Facebook Live videos but I often find the embed doesn’t work as well as YouTube. I have some older posts that have now had the video disappear so the YouTube embed is a little more stable.
Here’s an idea for refreshing some of your older blog posts:
- Find a post that has a point that can be made into a video
- Do a 2-3 minute Facebook Live video about that point
- Upload that video into YouTube
- Go back to that older post and embed the YouTube video onto the Post.
Now you have content that has been refreshed and when there is video on a page, people are more likely to stay on that page longer. Here’s an example of a post where I’ve done that: Top 10 Frequently Asked Questions about Facebook Ads
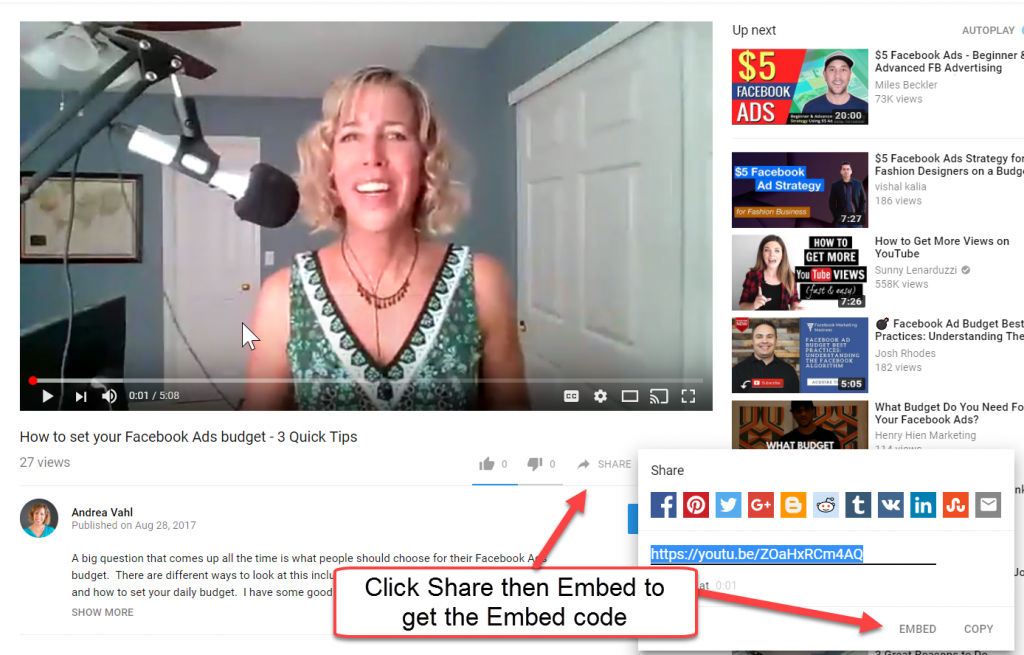
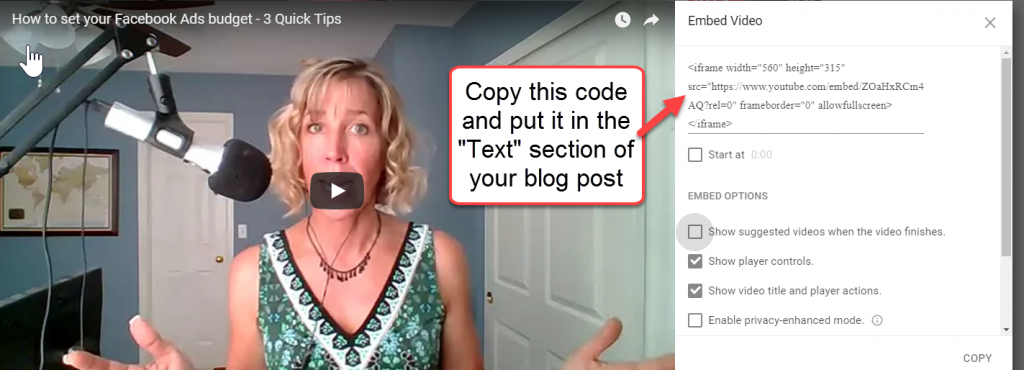
To embed a YouTube video into a blog post, go to the video and select the Share link under the video. Then select Embed.
You will get some code, and you have to put that in to the Text editor area of your blog post (not the visual editor).
#3 Cross Post the video to other Pages
Another wonderful thing that Facebook has is the ability to create captions easily from your Facebook Live videos.
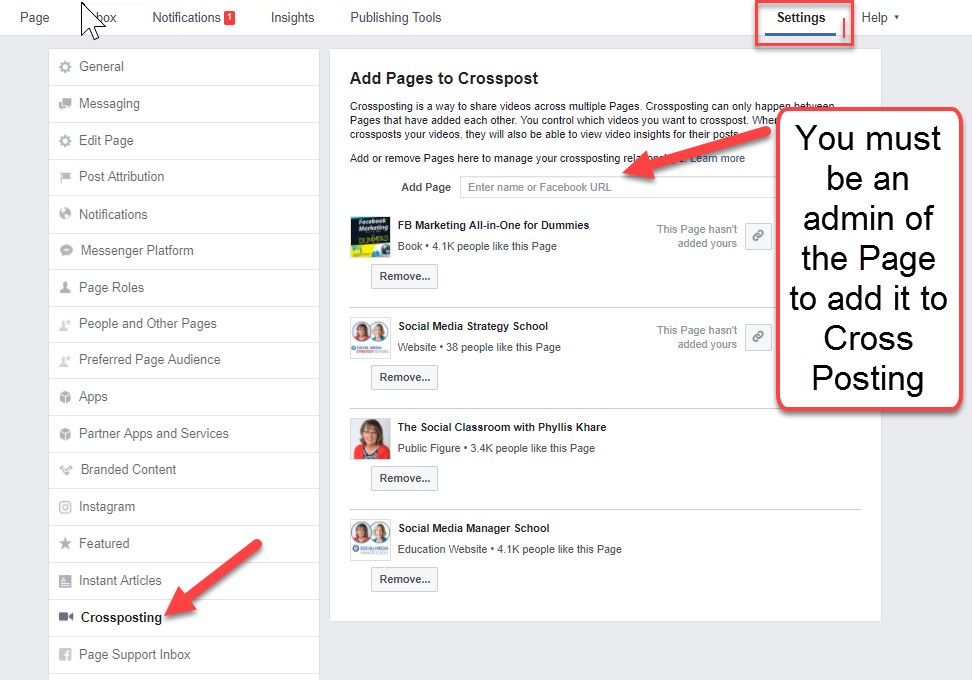
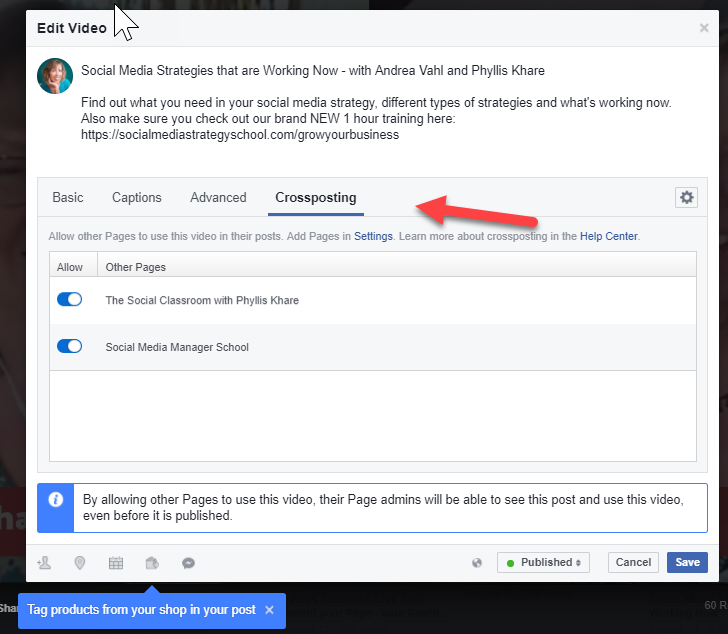
Crossposting is a way to share videos across multiple Pages and can be more visible than just sharing. The insights of both of the views from each page will be visible to both pages.
Crossposting can only happen between Pages that have added each other and you control which videos you want to crosspost.
First you have to go to your Settings and Add each Page to cross post to.
Then you can choose which videos you will allow for Cross Posting.
And select which Pages are allowed to Cross Post.
Bonus Tip – Make sure you Add Captions
Currently there isn’t a great way to download the SRT file that Facebook can create so you can add captions to the video. But you can definitely add the captions.
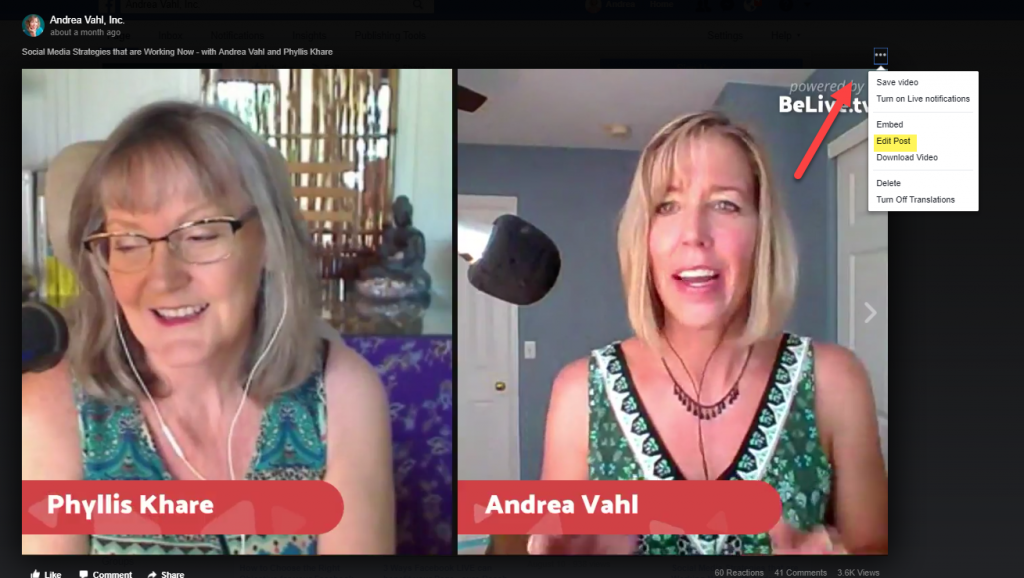
To do this, select Edit Post.
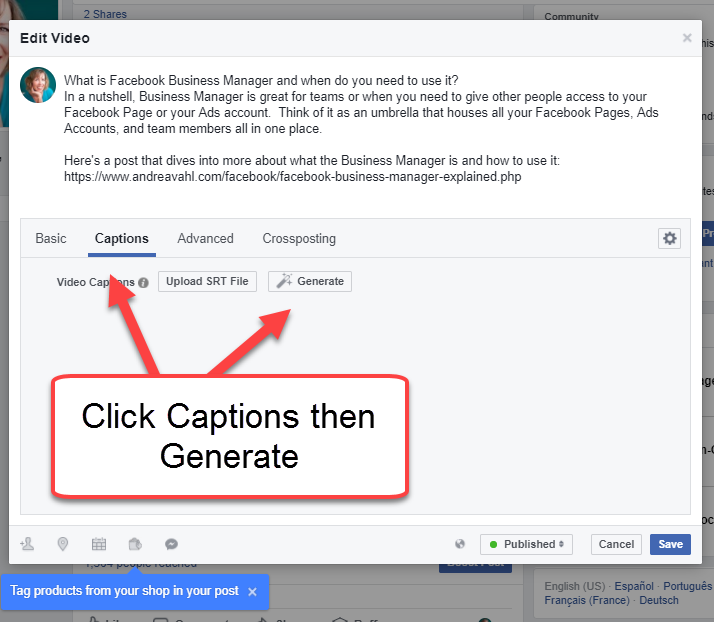
Then select Captions and Generate.
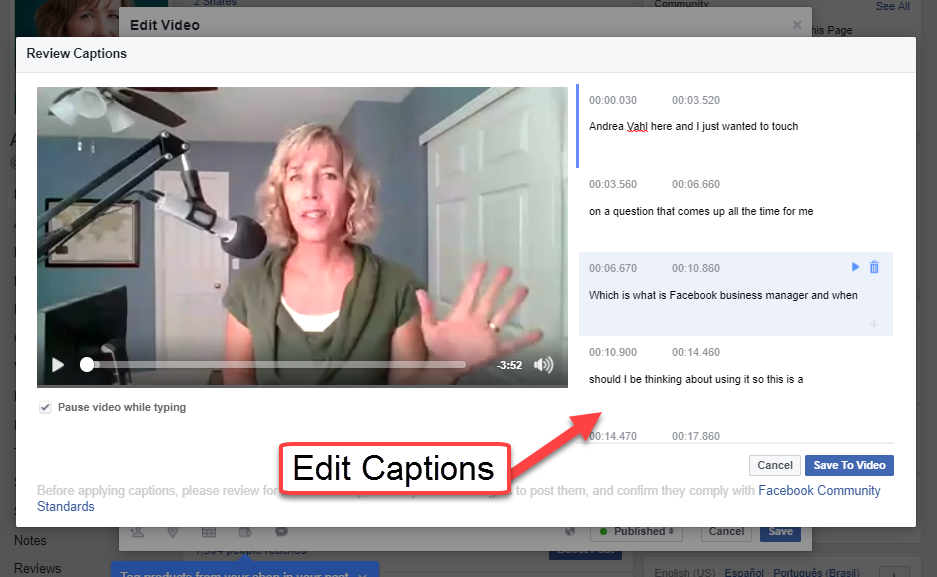
Now you will be able to edit the text of the captions. Facebook does a decent job of creating captions and since 85% of people watch videos with the sound off, this is time well spent.
So I hope that gives you some good ideas on different ways you can you the valuable content you are creating.
How about you, are you currently doing any Facebook Live Videos? Share your thoughts in the comments below!








Hey Andrea – great tips! There is actually a great wordpress plugin called Simple Social Press which automatically creates blog posts for all your FB live videos – it’s magic. It embeds the video, and includes the comments as blog post comments. Well worth the small outlay 🙂