Would you like to get more leads from Facebook and Instagram? Want to reduce your cost per optin? Facebook Lead ads are a great to grow your business.
In this article, you’ll learn the difference between Website Conversion ads and Instant Form Lead ads, and the step-by-step method to getting started with Instant Form Lead ads for both Facebook and Instagram.
The Difference Between Facebook Lead Ads and Website Conversion Ads
Many people are confused about the difference between an Instant Form Lead Generation ad and a Website Conversion ad. I find that people often select the wrong objective and then aren’t sure why the setup and ads aren’t working correctly.
The biggest difference is an Instant Forms Lead Generation Ad happens all ON Facebook and a Website Conversion Ad you are sending the traffic OFF of Facebook (to your website that has your own Facebook Pixel installed on it).
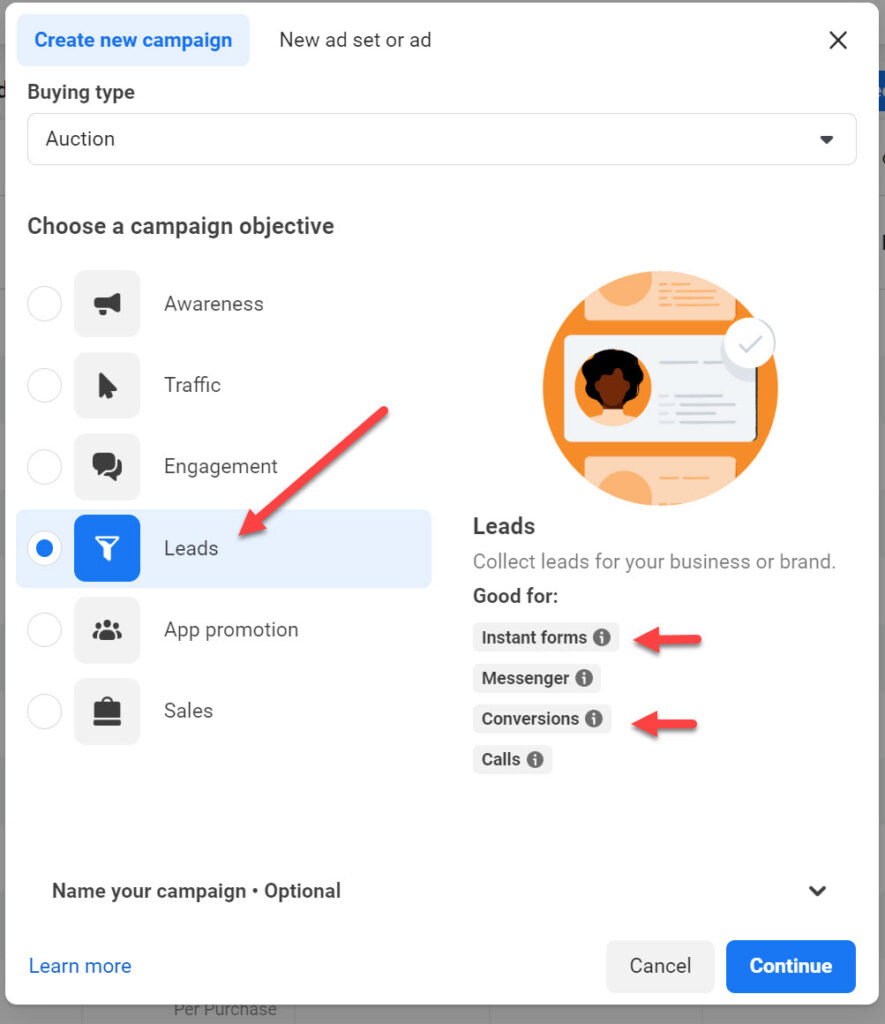
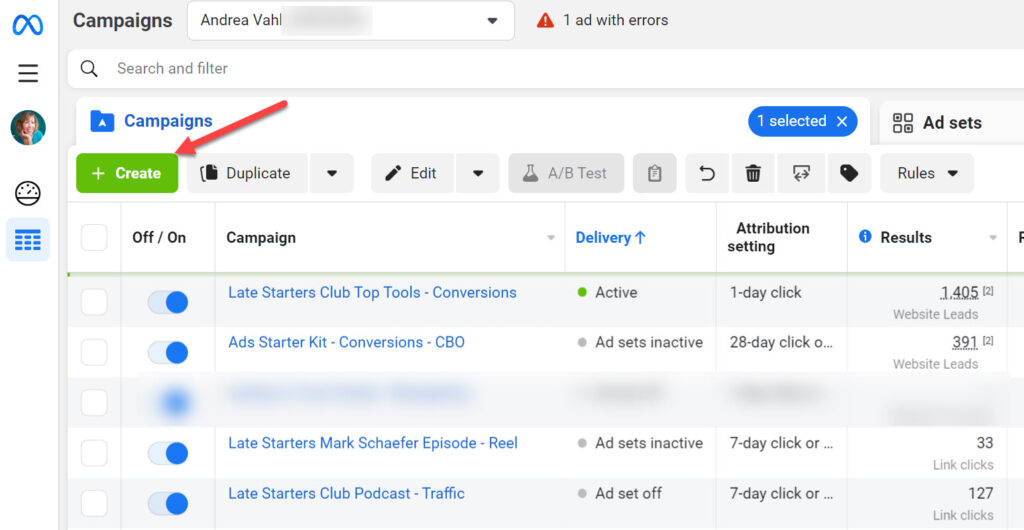
When you are in the Facebook Ads Manager and create a new Campaign, you’ll see the Leads option popup as a choice. Within that choice there are multiple options.
In all of these cases, you will select the “Conversion location” at the Ad Set level during the setup process.
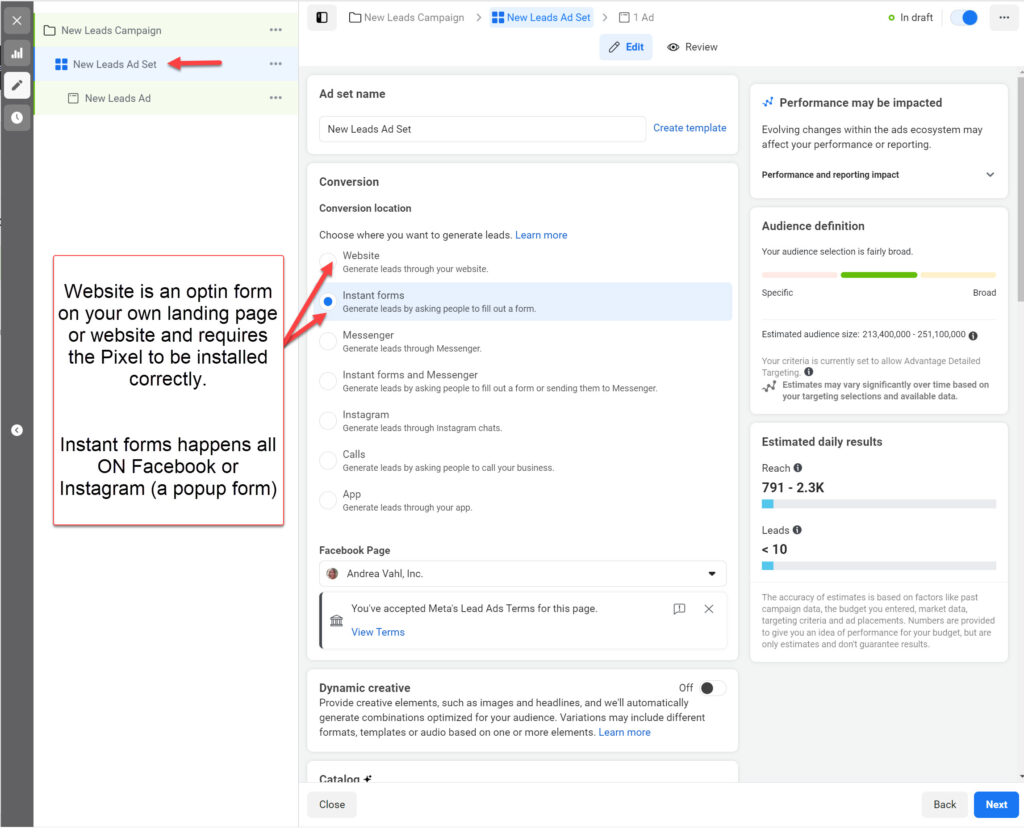
If you have a “landing page” or website that you want the traffic to go to, then you will need to select the Website option. Make sure you have the Facebook Pixel set up correctly. You will need a “Thank you page” where you can install the Lead Pixel so that you are optimizing around Leads.
If you don’t have a landing page or website but want to collect leads, the Instant Forms ad is a perfect solution for you. Even if you do have a website, it can be a good test to see if you can get less expensive leads.
The ad will have a popup form on Facebook where the user’s name email and phone number (or other information you request) is already pre-populated into the form. This makes it easy for people to complete the form on mobile devices.
I do find that the Website conversion ads can give higher quality leads but there is an option to ask for “higher intent” leads on the Instant Form which helps with lead quality.
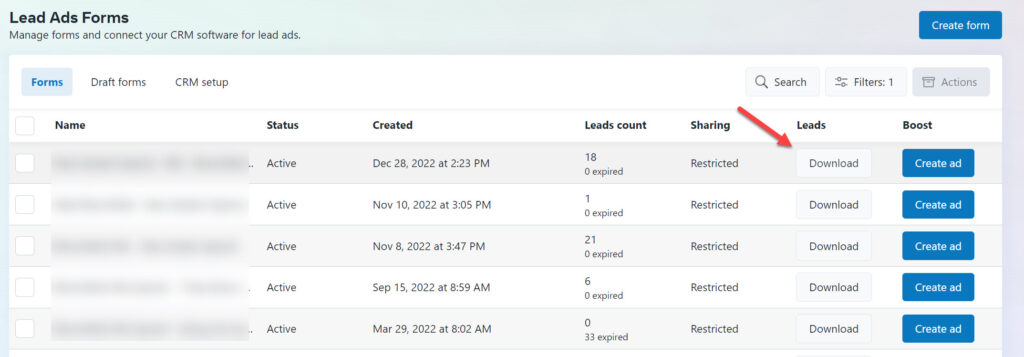
With Instant Forms, your Leads show up in the Leads Center section of the Meta Business Suite found here: https://business.facebook.com/latest/leads_center. The leads will “Expire” if you don’t download them within 90 days.
You can automate the connection between the Facebook Leads Center and your email provider (or even set them up to automatically email you or text you). To do this you will need a paid tool like Zapier. Facebook also has some integrations available.
Overview of Steps for a Facebook or Instagram Lead Ad
Here are the general steps you will take to create a Facebook Lead Ad. I’ll give the overview of the process and then break these down into smaller steps.
- Create an Instant Form on your Facebook Page. Go to the Facebook Meta Business Suite here: https://business.facebook.com/latest/instant_forms/forms and create an Instant Form that will capture the person’s information. You can also do this step during the ad setup phase but I prefer to do it ahead of time.
- Start the Lead Ad Campaign in Ads Manager. Go to the Facebook Ads Manager and click the green Create button. As shown, in the image above, select Leads from the popup box.
- Ad the Ad Set Level, select Instant Forms. Along the way you’ll be creating the Ad targeting, budgeting, and other settings just as you would for any ad campaign.
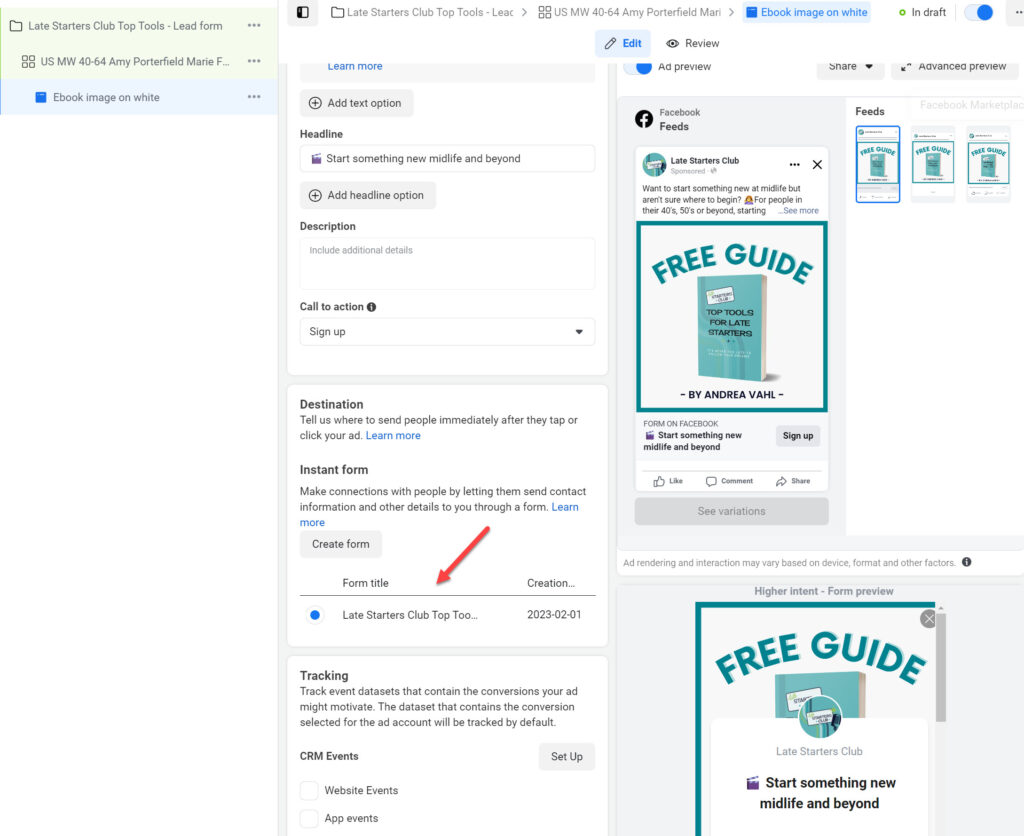
- At the Ad Level, make sure you’ve selected the Form that you just created. You will create your Facebook ad text and image normally but you will select the Form
- Run the Ad campaign and download the Leads in the Lead Center in the Business Suite on your Page. Alternatively you can set up an integration like Zapier to connect the Leads Center to your email system.
As with any type of campaign, you will watch your cost per Lead and split test different audiences and ads.
Note that you can run the ads on Facebook or Instagram with this process. I like breaking out each of the placements to see which one is performing better.
Creating an Instant Form on your Facebook Page
Now let’s dive into creating your Instant Form.
You can do this within the Ads Manager as you create your ad but I like to do it first because it takes a little time.
To create your Instant Lead Form, go to your Facebook Page and follow these steps:
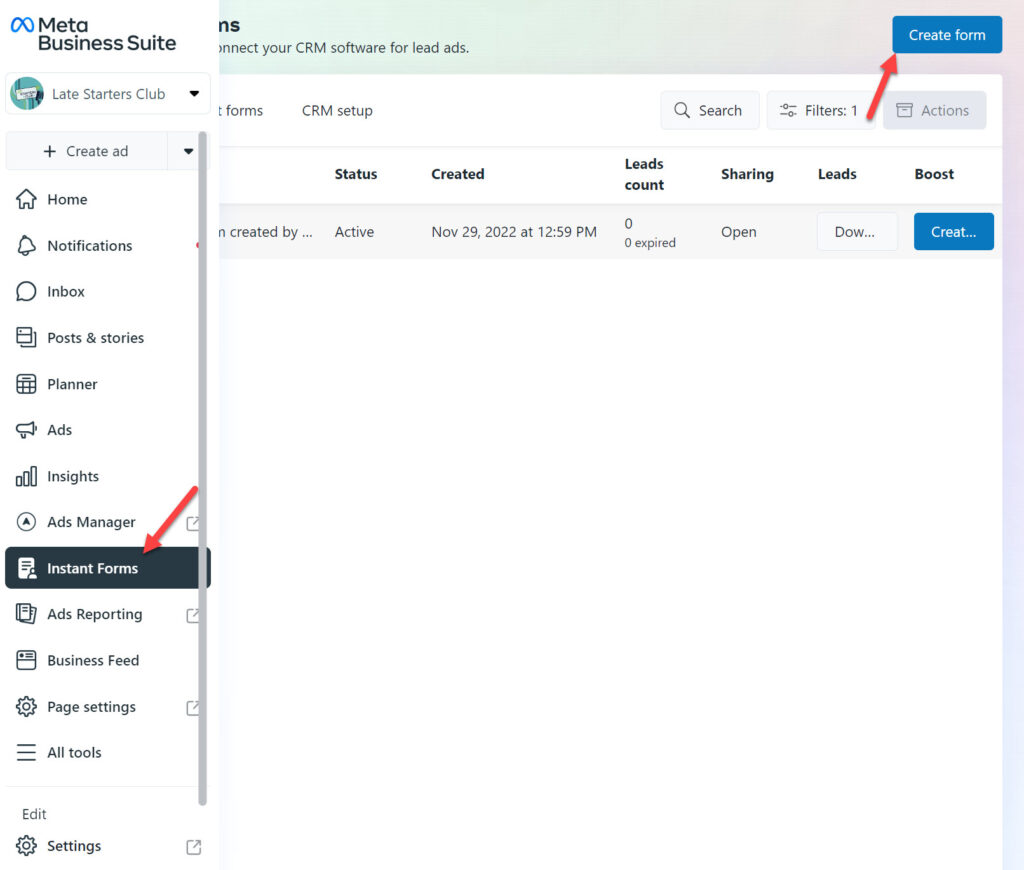
- Navigate into the Instant Forms section within the Meta Business Suite. Because Pages can have very different navigation I like to use this direct link: https://business.facebook.com/latest/instant_forms/forms
- Click the blue Create Form button in the upper right and a popup box will appear to configure the form.
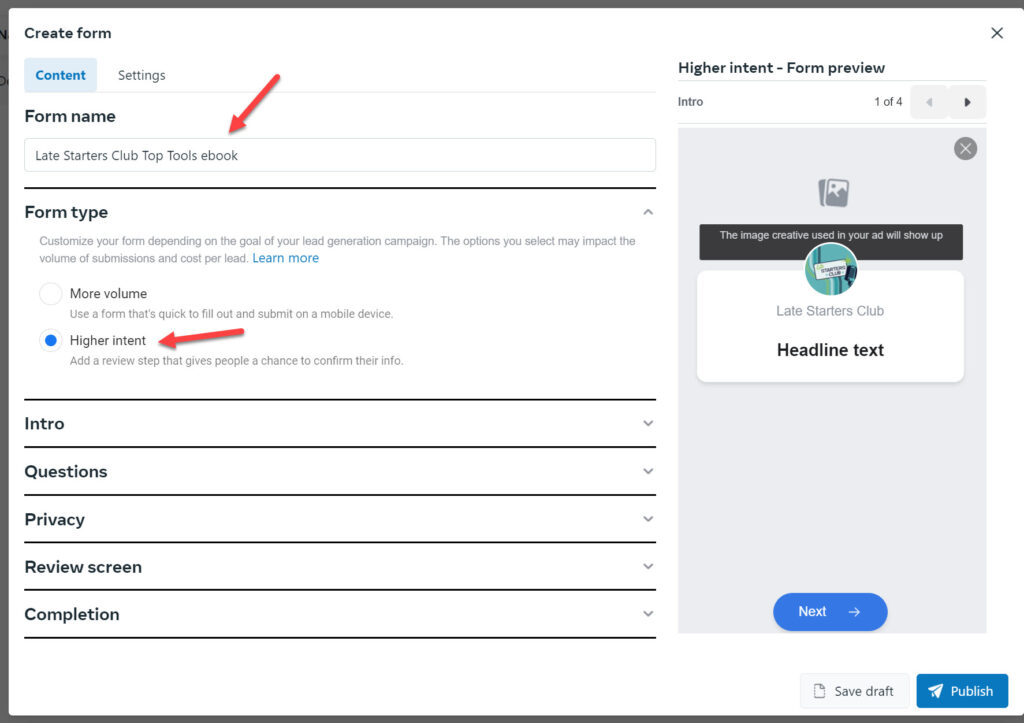
- Name the form and select Higher Intent (this will give you higher quality leads because people have to confirm their information but they will cost a bit more).
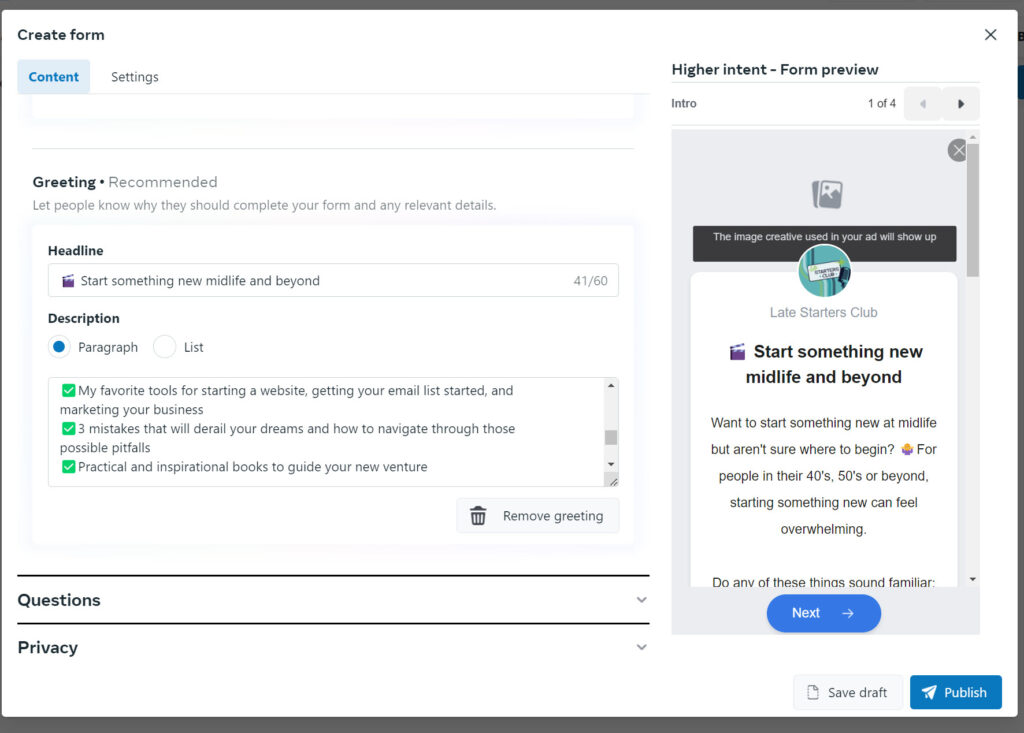
- Expand each of the sections and personalize to what you are advertising
- Intro is the text in the form and this is ok to match your ad text. This is what you are offering and you can make this longform text if you like.
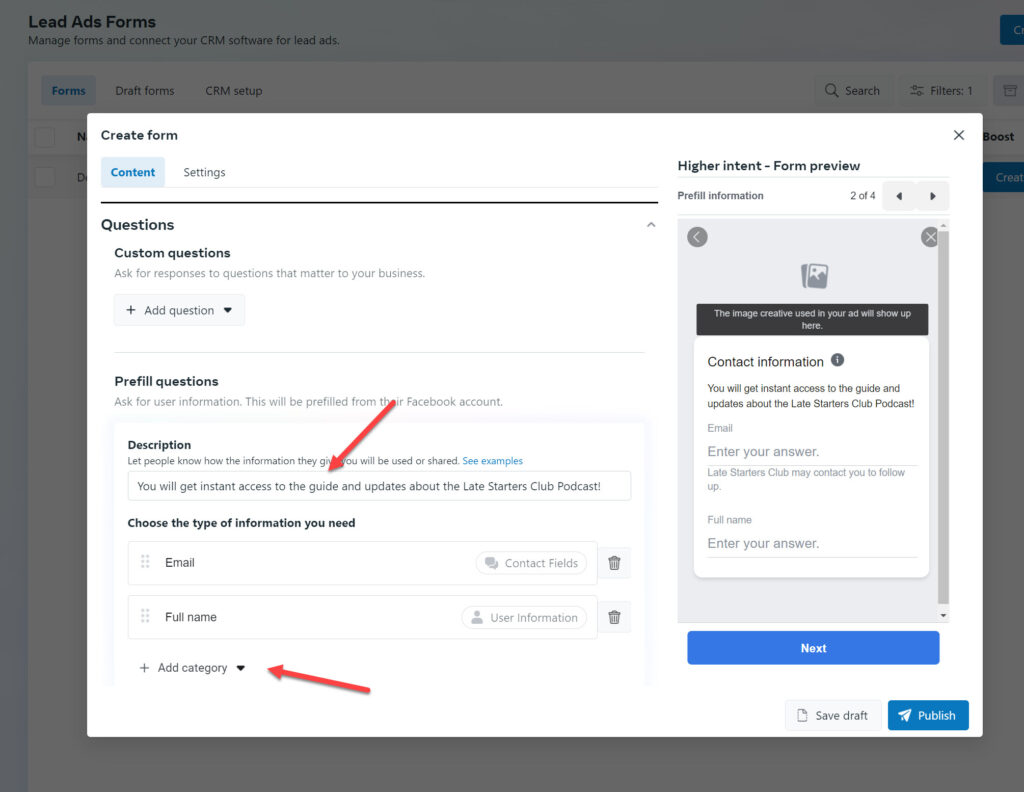
- Questions are where you select what information you want from the person. Facebook pre-selects Full name and Email but you can customize what you ask for as well as customize the text in the form. The more information you ask for, the less likely that someone will give you their information. You also have to let people know how the information will be used in the Description section.
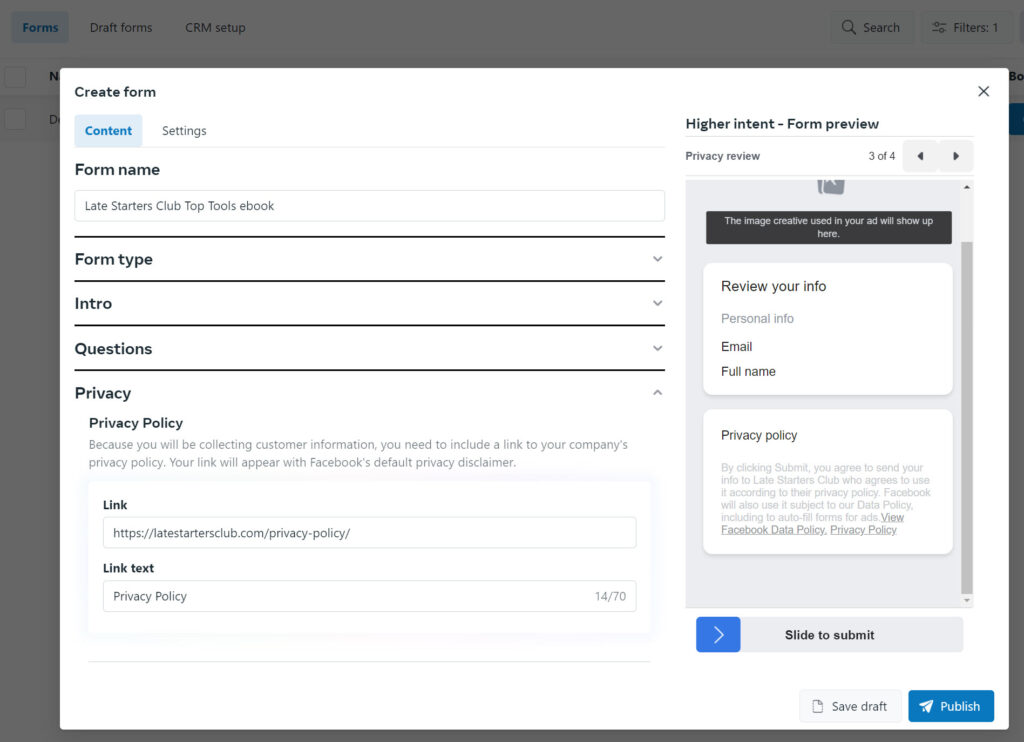
- Privacy is a link to the privacy terms on your website which you must have.
- Review Screen is where they confirm their information and that can be left as is.
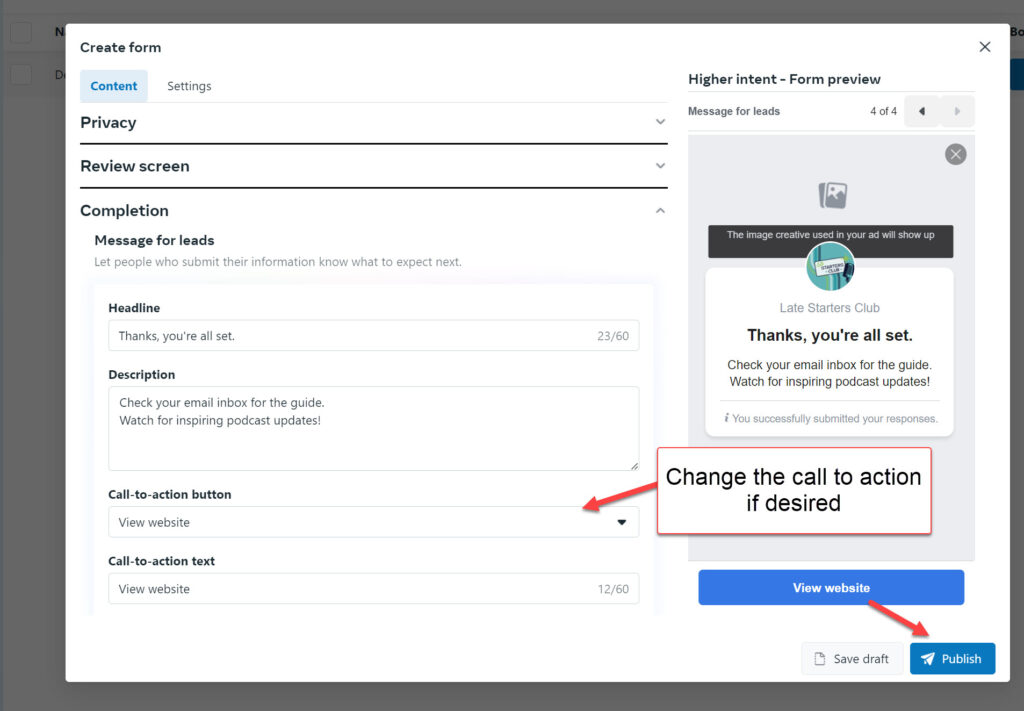
- Completion is the call to action after they have filled out the form. You can have them go to a page on your website, call your business, or download something.
Once you are done creating the form, you can click Publish in the lower right corner. Once it is published, you cannot edit the form. If you need to continue editing the Form later, select Save and the Form will be in Draft mode. You cannot use it in an Ad until you have clicked Publish.
Instant Form Step by Step images
Creating your Facebook or Instagram Lead Ad
Now that you have created the Instant Lead Form, all you need to do is create the Lead Generation Ad and specify that form in the Ad creation process.
Creating the Lead ad is just like creating any other ad, you’ll use the same principles in targeting and writing your ad. There are a few differences in the process to highlight.
First, navigate to the Ads Manager area (I like to go directly there https://business.facebook.com/adsmanager/manage/), click the green Create button to get started.
Then as noted in an earlier image, you’ll choose the Leads Objective from the popup button.
It’s a good idea to name your Campaigns with something descriptive and then you can click Next in the bottom right corner to navigate down to the Ad Set level.
At the Ad Set level, you will select Instant forms as the Conversion location, then choose the Facebook Page that you will be using. Even if you are only going to be advertising on Instagram you need to select the Facebook Page since that’s where the form is located.
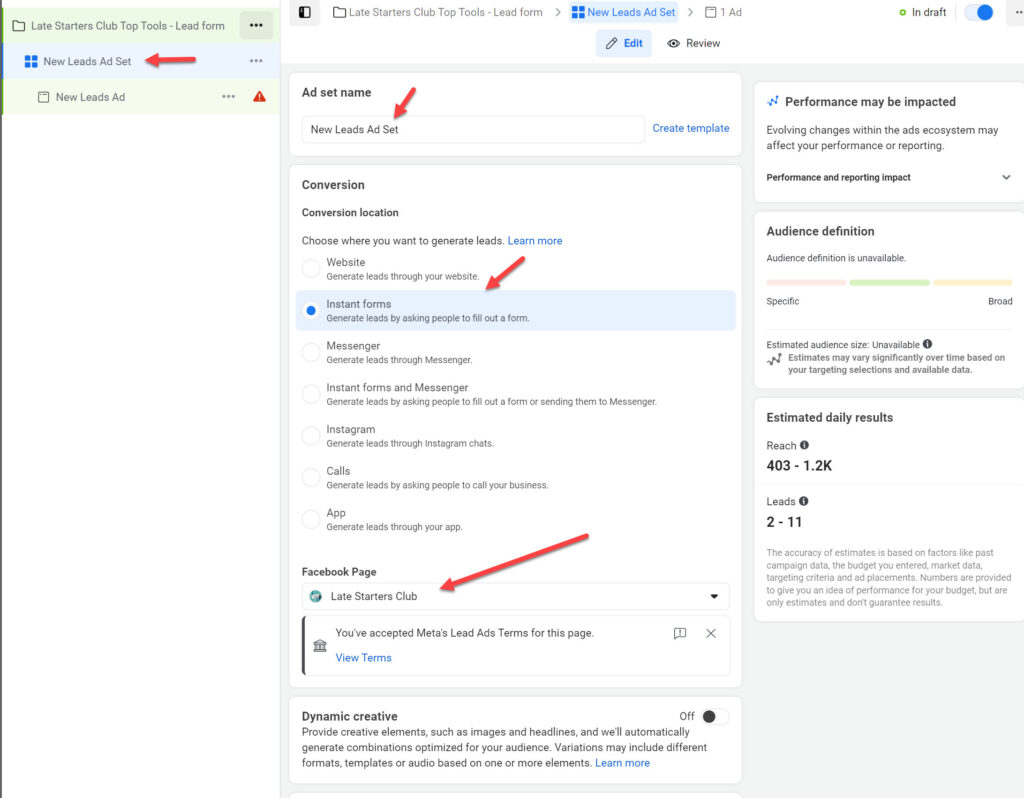
You may need to Accept the Meta Lead Ads Terms before continuing if you haven’t done so already.
You will set up your Ad Set with the targeting, placements, budgeting, and other optimizations as you normally would. Remember to title your Ad Set with a description that will help you know your targeting and settings.
Then select next in the lower right corner to navigate to the Ad Set level.
At the Ad Level, you will create the Headline and Text of your ad just as you normally would. But you will then select the Instant Form that you created on your Page for the Lead capture.
When you have the ad set up the way you would like, you can click Publish in the lower right corner.
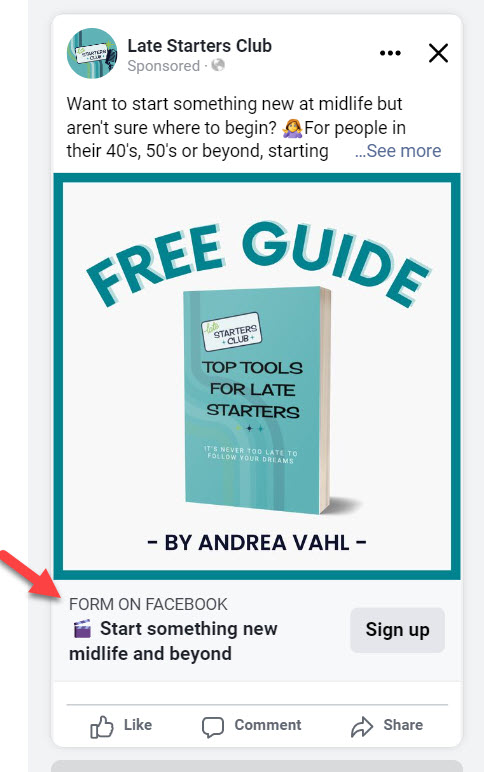
An Instant form Lead ad will look the same as a regular ad initially but you will see the “Form on Facebook” indicator that a popup form appears.
Accessing your Leads in the Instant Forms Section of your Facebook Page
Your Leads appear in the Instant Forms area of your Facebook Page which you can access directly here: https://business.facebook.com/latest/instant_forms/forms
Ideally you will automate this process rather than having to go into your Page each day and download the Leads manually.
And remember the Leads Expire after 90 days so make sure you download your Leads regularly if you are running ads (and of course just to follow up as promptly as possible).
Facebook Lead ads are a powerful way to grow your email list, connect with possible clients and get true ROI from Facebook ad campaigns.
Lead Generation Ads take a little more setup time initially. But these types of ads are going to be better optimized to give you more leads and sales typically.
Congratulations if you have set one of these types of ads up—you are well on your way to making the most of your Facebook Ad campaigns!