
Do you need to set up a Facebook Page for your business? While creating the Facebook Page is a fairly straightforward process, many people don’t know about some of the settings and Page features to optimize.
In this article, you’ll learn how to set up your Page right and how avoid any pitfalls that can prevent your Page from being seen.
If you haven’t set up your Page at all, start by logging into Facebook as your personal profile (they will use the same login but your Page is very separate from your personal profile) and then go to www.facebook.com/pages/create.php.
#1 Choose an Overall Category
Your first decisions is to choose between 6 overall categories. The difference between these main categories is usually in what information you have available in your About section. You can always change your category later so this step is not critical.
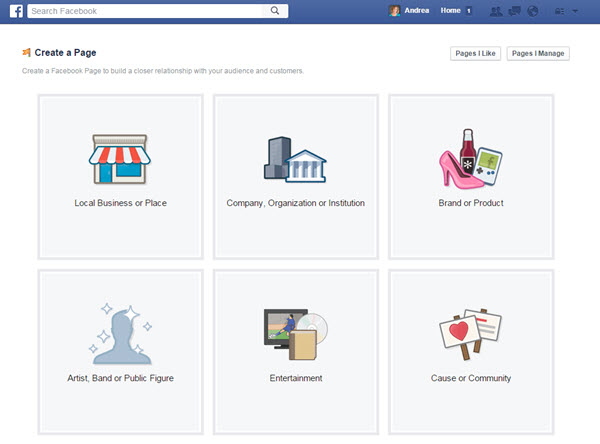
- Local Business or Place: This Page type is for bricks-and-mortar businesses. Choose this type only if you truly have a local, open-to-the-public type of business. When you choose this category and add your physical address, a Facebook Place is automatically created for you, as well where people can check in. Warning: Don’t list your home office as a Local Business! Local businesses also have the Facebook Reviews enabled when there is an address associated with the Page. Once you choose local business, you can further segment your category to restaurant, beauty salon, movie theater or over 40 other subcategories.
- Company, Organization, or Institution: This Page type is for a company that isn’t necessarily open to the public the way a local business would be. Many of the categories in this drop-down menu are the same as those for the Local Business or Place type, but the resulting Info Page won’t have the same detailed interface to fill in for prices, parking, and so on.
- Brand or Product: If you sell an actual physical product, this is the Page type to consider. Facebook offers many categories: cars, clothing, computers, pet supplies, and a generic product/service category.
- Artist, Band or Public Figure: Obviously, if you’re a band or artist, this type is the one to choose, but this Page type also covers politicians, businesspeople, chefs, dancers, and actors. You may think that the actor category would be in Entertainment (see the next bullet), but it isn’t! It’s here, under the Artist, Band or Public Figure.
- Entertainment: If you have a TV show or a magazine, or are creating a Page just for your music CD, select this Page type. There are close to 30 different categories listed here.
- Cause or Community: If you’ve been on Facebook for a while, don’t confuse this type of Page with the Causes application. If you’re new to Facebook and are creating a Page for a nonprofit or community organization, don’t select this Page type — instead, opt for Company, Organization, or Institution, and select the category of Non-Profit.
Once you make your selection, you may have to select a sub category from the drop-down menu. These aren’t perfect – pick something that matches as best you can.

The category is listed underneath your Page name on your Page. Local sub-categories are a little more important as people may be searching for that type of local business on their mobile phone.
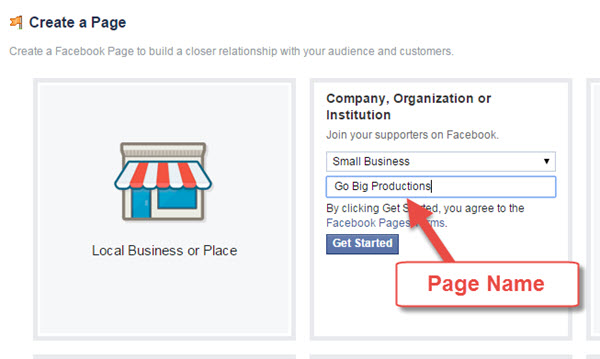
#2 Name Your Page
Naming your page shows up in the very first screen but it may not be obvious to you.
There are some important things to think about if you don’t have a “traditional” brand name when you are naming your Facebook Page.
If you are a Realtor, or Author, you may choose to brand that part of your business such as “Andrea Vahl – Author”. Here are a couple other tips:
- Have proper spaces between words. I’ve seen Pages that are titled “Andreavahlcoaching” for example. Unless your “brand” name has the spaces removed, don’t remove them yourself.
- Don’t add the .com to the end I’ve also seen Pages named “Andreavahl.com” which doesn’t make sense unless you are branding your business that way and that is the official name of your business.
- Don’t make the Page name too long. You have a limit of 70 characters for your Page Name. But that can be a bit long. Keywords can be good to use in a Page name since that will help it come up in the Facebook searches better. But it can look a little strange to have a Page name with too many keywords stuffed into the title such as “Andrea Vahl – Speaker, Author, Coach, Consultant, Improv Comedienne”.
- If your brand has unusual capitalization, you may have to submit a request to Facebook. Facebook initially requires standard capitalization of words. So if your name is WidgetPro, you’ll have to submit a request with documentation of your brand name to Facebook Help.
If you need to adjust your Page name, you can do that up until the point where you have 200 Likes by going to your About section. If you are a Local Business make sure you select Page Info.
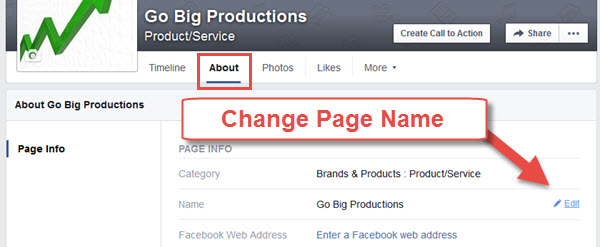
If you have more than 200 Likes, you may be able to Request a change right from your Page. You are typically allowed one Page Name Change Request from your Page. You may have to go through Facebook Help to request a change and provide documentation of your company name (usually a utility bill or something like that).
Once you have named your Page on that first screen, select the blue Get Started button and you will then be on your way to adding more to your Page.
#3 Set up your About Section
If you are setting up your Facebook Page for the first time, you are asked to give people a “short description” of your Page. But don’t let this be the end of your description. Your full About section has much more text available and is indexed in Google so you want to have plenty of keywords.
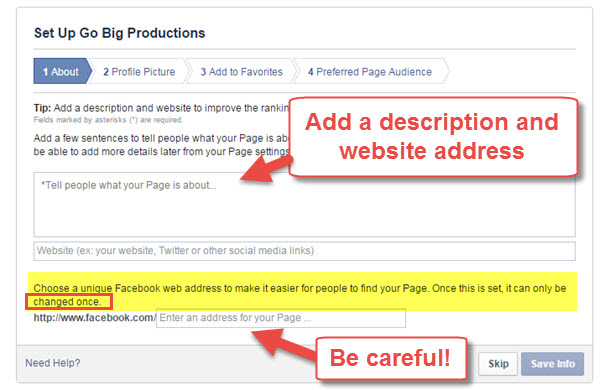
You also want to make sure you choose a Facebook web address for your Page VERY carefully. You can skip this part and choose later if you like. A Facebook web address makes it easy for you to give your address to someone so they don’t have to rely on Facebook Search (notoriously bad). So for example, www.facebook.com/GrandmaMaryShow
When you choose a Facebook web address note a couple of things:
- No spaces or underscores
- Capitalize the words for readability (this will not affect if people type in lower case letters for the address)
- Your preferred web address may not be available
- It is very hard to transfer web addresses or change them
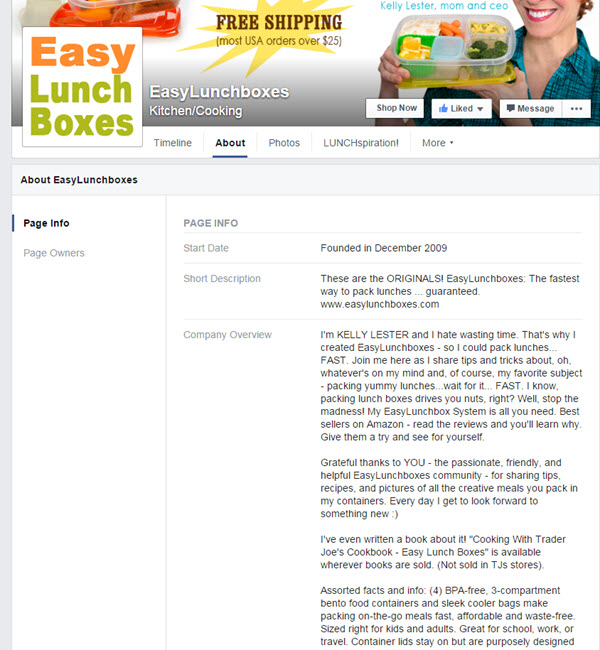
If your Page is already set up, this is a good time to review your About Section to make sure it’s keyword rich and descriptive. Look at how it looks on the left sidebar of your Page and in the About area. The Short Description appears on your main Page so make that pop. Take a look at Easy Lunch Boxes About Page for a good example.
I also have some more examples here: 4 Inspiring Examples of an Engaging Facebook About Page
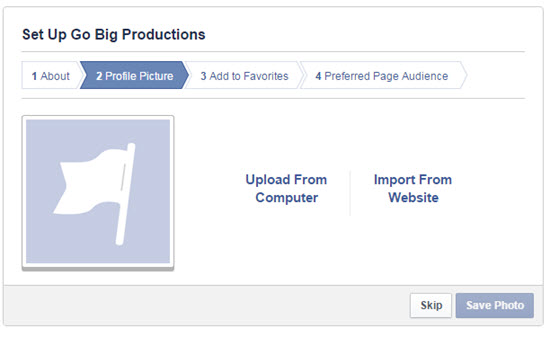
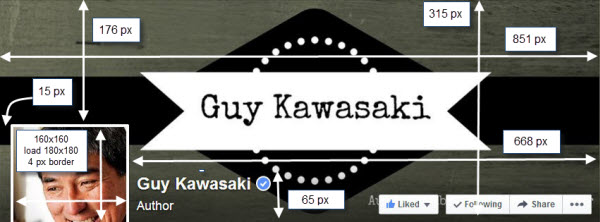
#4 Optimize Your Profile Photo
Your Profile picture is 180 pixels by 180 pixels and then it sizes down to 160 x 160. If you have an oblong logo, it can look a little strange. It’s best if you can have something designed that is square if possible to have it show up a little better. But if that isn’t possible, make sure you are choosing the best look for your profile photo.
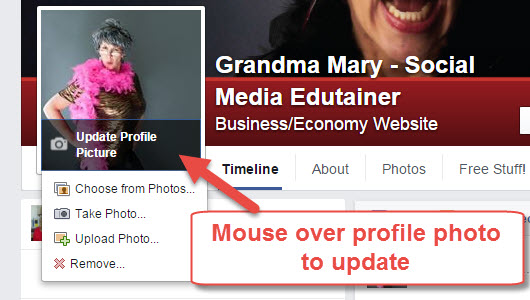
Your profile photo shows up next to every post so make it interesting. If you are the “face” of your business, feel free to make this a picture of you. But make it different from your personal profile photo.
If you need to change your profile photo later, just mouse over that area and make the change.
If you are just setting up your Page for the first time, there is a step 3 and Step 4 that come after the profile photo upload. You can choose to skip them, they are optional and not critical.
#5 Optimize Your Cover Photo
One of the biggest pieces of visual real estate on your Page is your Cover photo so make sure you use it wisely. The image size is 851 x 315 px and be careful to hide anything important behind the profile photo or interfere with the readability of your Facebook Page name at the bottom of the cover photo.
Keep the bottom 65 pixels or so free from text or busy graphics.
Venngage has some great examples and some templates for Facebook cover photos on their site.
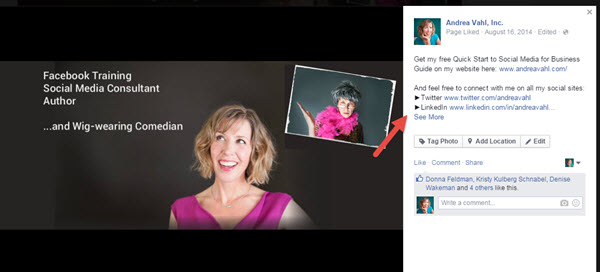
Also remember that you can add a photo description to your cover photo so that if someone clicks on it there is an added call to action. In my cover photo description I have some links to my other social sites as well as an invitation to join my email list.
#6 Add a Call to Action button
Another quick thing to optimize is the Call to Action button that every Page has. Use this to take people to your website, watch a video or other great actions.
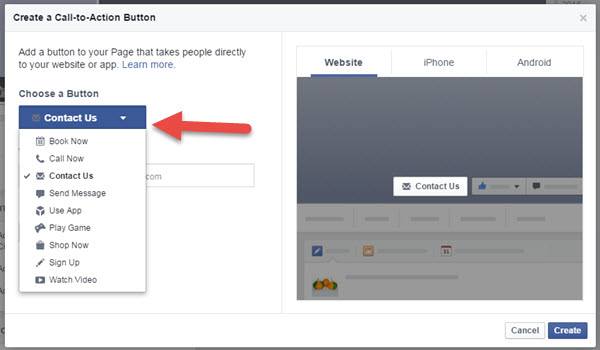
Once you choose the button, then you will customize either where that traffic goes or other things related to that button.
#7 Check Your Permissions and Page Settings
Another important thing to optimize is the Permissions and settings on the Page. Go to Settings and then General to set some of the most important settings. I can’t go through every setting here but the most important considerations are:
- Page Visibility – Your Page is considered “published” as soon as you create it. You don’t have to worry too much that your Page is going to go viral before it’s ready, but if you do want to “hide” it while you work on it, unpublish the Page so only Admins can see it.
- Messages – Make sure you will be checking them regularly if you allow people to send your Page messages.
- Country and Age Restrictions – Do not set any restrictions because that will cause your Page to be invisible unless someone is logged in to Facebook (since Facebook would have to make sure you were in the right country before it showed the Page to you).
- Profanity – I think it’s a good idea to set the filter to medium and possibly restrict some words.
- Allow people to post and tag – I think this is a good idea in general especially when you are first starting out. If there is a privacy concern then you can look at restricting these.
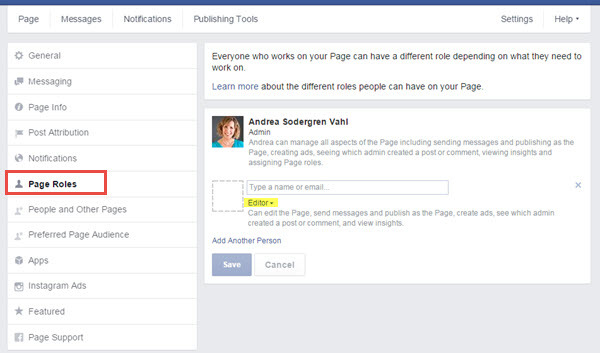
#8 Set Your Admins
If you are going to have other people manage your Page, you can add Page Admins under the Page Roles section. Be careful who you give full Admin access to because they (or someone who hacked into their account) could delete your Page or take control of it.
If you are going to have multiple Admins on your Page, you may want to consider the Facebook Business Manager which is a little more secure.
#9 Add Apps
The Apps section can be found in two places. Once under the More button right below the cover photo and also on the left sidebar. On the left sidebar you can customize your App cover photo to brand it. The App cover photo size is 111 x 74 px.
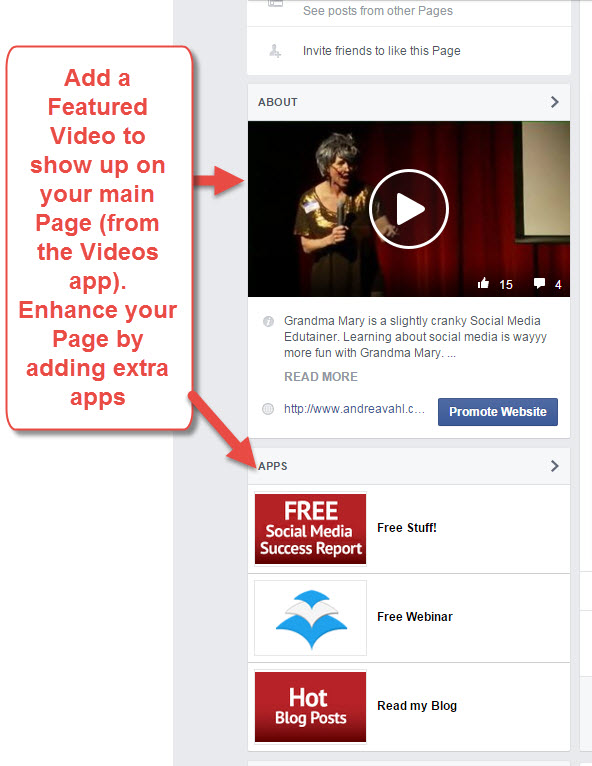
Apps are not as important as they used to be on Facebook but if you want to do something like connect Instagram to your Page or have another place where someone can easily sign up for your e-mail list, then why not? I wrote a post 15 Types of Facebook Apps to Enhance Your Page that can help you find some interesting ones.
#10 Post Great Content
Before you start publicizing your Page, make sure it has at least 5 or 6 representative posts of what you’ll be posting about. I recommend posting at least once per day and varying your posts between links, images, videos and some text. Get my free report on 50 Facebook Posts Guaranteed to Engage and don’t forget you can always schedule your posts to batch your work a little.
Final Bonus Tip: Invite People to Like Your Page
Once your Page is ready to go, make sure you invite your friends, co-workers, customers, and whoever else makes sense to come and Like it! Also consider running a targeted Facebook Like Campaign.
And remember to have fun with your Facebook Page – post a little humor and add some personality! As Grandma Mary says, Don’t be boring!
Download this in a FREE pdf
Go here https://www.andreavahl.com/facebookpagechecklist and grab your reference copy!


#11– add your FB page to your Business Manager account and/or the Business Manager of the agency/consultant you’re working with.
Yes for sure, Dennis, if you are working with someone (which is a very good idea for beginners) 🙂 Thanks!
Andrea– that’s why people need YOU! <3
This is a great list! Is this also available as a download/PDF? Would love to save a copy with the rest of my course materials!
Excellent idea! Working on that now 🙂