Are you considering using a Facebook Group for your business presence on Facebook? Maybe you are starting a new Group for a product or service you have or maybe you want to create a Group to connect like-minded business people around your niche.
Facebook Groups are getting more popular since they are more visible in the News Feed than Facebook Pages. I wrote more about some of the advantages in this post: Should I have a Facebook Page or a Facebook Group for my Business?
In this post, I’ll show you how to create a Group, how to promote your Facebook Group, and some of the Do’s and Don’ts of Facebook Groups.
Reasons a Facebook Group Makes Sense for Your Business
Facebook Groups are a great place for a “natural group” of people to hang out including local connections, people who are part of a premium product that you sell, mastermind groups, customer service help,and more.
AgoraPulse has a great list of 10 Reasons to Create a Facebook Group Today – including an example from me!
One of the biggest benefits to Groups is that they are more visible in the News Feed because of the way notifications work on Facebook and Facebook’s algorithm.. When you join a Facebook group, your notifications are set to Highlights by default. Which means you may get notifications for posts that are getting more interaction in the Group, or if your friend has posted something in the Group. Whereas when you Like a Page, you don’t get notifications unless you manually set them.
But you have to remember that EVERY post from members of the Group is more visible. So Groups require much more moderation than Pages. You can restrict the Posting Permissions to just Admins or have each post approved by an Admin or Moderator but I think that stifles the conversation a bit. And usually, if you have good rules in place, people respect them.
One other consideration with using Facebook Groups for a business is that ONLY PERSONAL PROFILES can join or create Facebook Groups. So you will have to participate in the Group as yourself. Pages can’t post into Facebook Groups or be a part of them at all. But you can always make sure your Facebook privacy settings are locked down appropriately so your personal information is more private.
How to Create a Facebook Group
Creating a Facebook Group is very easy to do but there are some settings you do want to pay attention to.
Here are the steps to creating a Facebook Group:
- Log into Facebook as your profile.
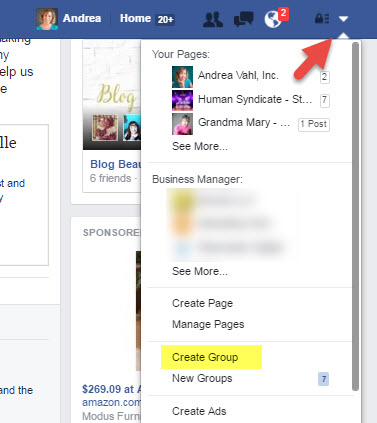
- Click the
 in the top right corner and select Create Group.
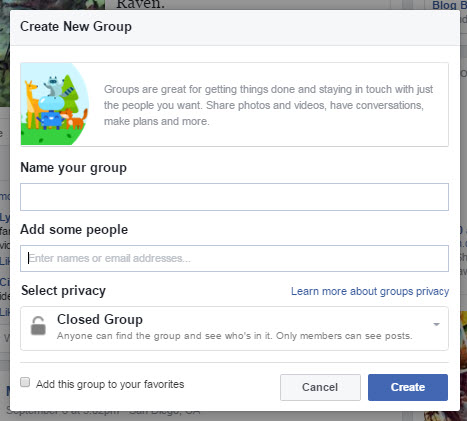
 - Name your Group (note that you can change the Group name any time up to 5000 members).
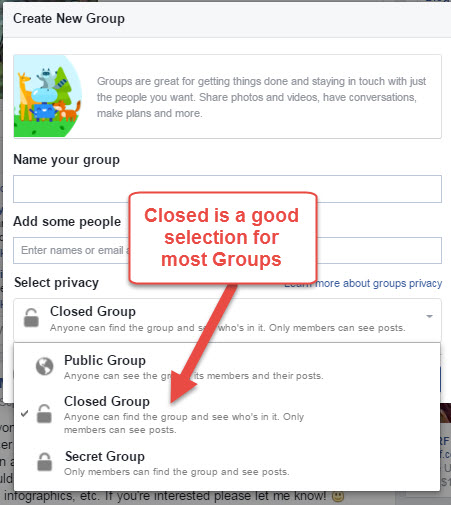
- Select the privacy of your Group to Open, Closed, or Secret.
- Click Create.
Here are a few images to help with the process.
Step 2:
Step 3:
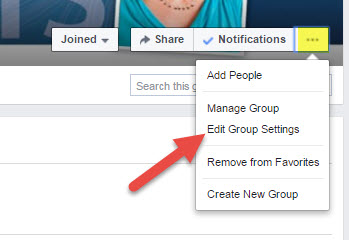
Step 4:
The Group Privacy settings available are
- Public – Anyone can see the group’s members and their posts. This can be a little too open since anyone can join and start posting.
- Closed – Anyone can find the group and see who’s in it but only members can see the posts. This is the best option for most groups.
- Secret – Only members can find the group and see posts. You must give people a direct link to the group if you want to invite them in or add them.
Also realize you can change the privacy setting of the Group up to 5000 members any which way you want. But after 5000 members, you can only make the privacy settings more restrictive (i.e. Closed to Secret).
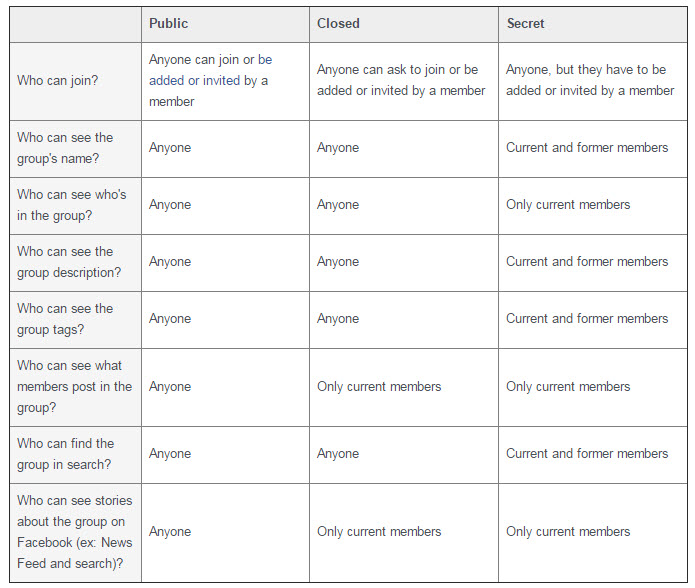
There are come added complexities around who can see what within Groups and Facebook has a nice chart on the privacy settings:
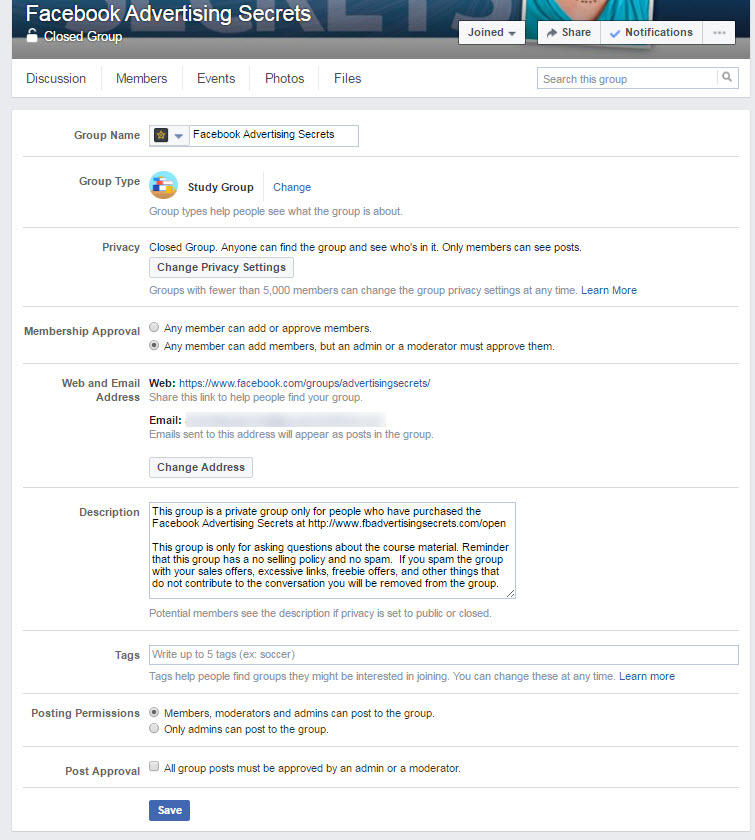
Once you have the Group created, make sure you visit the Group Settings area to personalize your Group.
Here are some things to customize:
- Group Type – choose the Group type to help let people know what the Group is about.
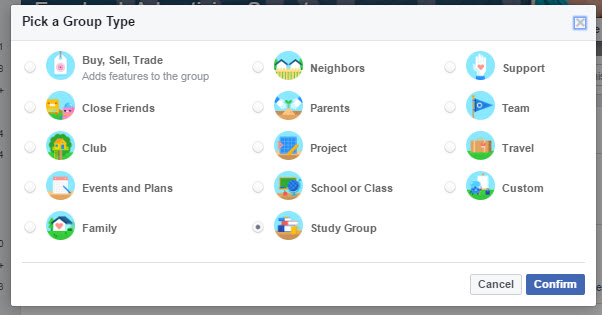
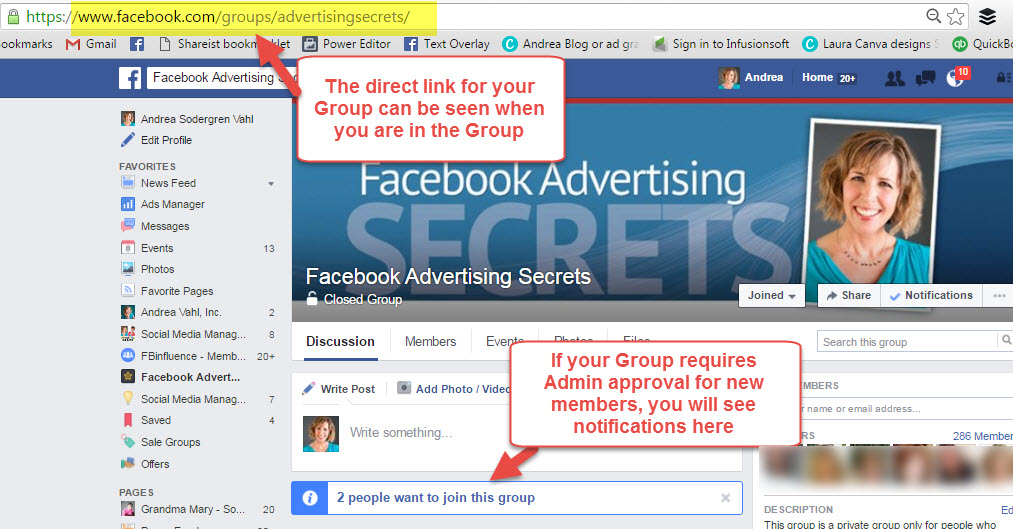
- Membership Approval – select if the group members must be approved by an Admin or Moderator (recommended)
- Customize your Group Web address – this will make it easier to give people the URL of your Group.
- Add a Description – make sure it’s clear in the description who the group is for and what parameters or rules there may be in the group.
- Add Tags – this is good if you want people to be able to find your group easier. You can skip if your group is more of an invitation-only group.
- Posting Permissions and Post Approval – set these according to how you want to moderate the group posts.
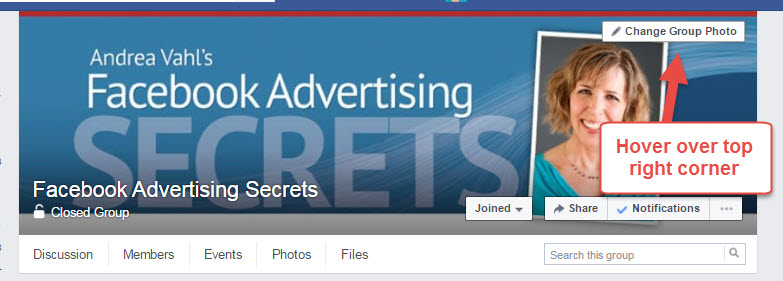
And then finally make sure you add a cover image for your Group. There are many different “official sizes” floating around and all Facebook mentions is that the image must be at least 400 x 150 pixels. But I’ve found that 801 x 250 is a good size.
Now that you have your Facebook Group set up right, it’s time to get the word out about your Group. (And a little FYI and plug for my Facebook Advertising Secrets Group – it is private only for people who have purchased the course but you can feel free to join us here: Facebook Advertising Secrets – it’s a great course if I do say so myself 🙂
How to Promote Your Facebook Group
The first thing you DON’T want to do is to start adding a bunch of people to your Group without their permission. I cover this in my Facebook Groups: 5 Unwritten Rules post so make sure you check that out.
The best way is to invite people personally. You can do this by:
- Inviting people personally through an e-mail with your invitation and why they might want to join. Give them a link to the Group to join if they would like. Outline what’s in it for them.
- Sharing the link to your Group on your Facebook profile with an invitation for people to join. (Do not share your link to your Facebook Group in other Groups – see #4 on spamming Groups).
- Sharing the link to your Group in other places like Twitter, LinkedIn, or at the bottom of your e-mail signature.
If your group is more for a select group such as a Mastermind group or group of people who have bought a product, then you can consider adding them manually to the group. Or you can give them the direct link to the group (which you have set up in the Settings area or you can find by navigating to your Group and looking at the URL.
As of this writing, there is no way to promote a Facebook Group address in a Facebook Ad. Years ago, they used to have ads for Groups but that has been long gone. So the other alternative would be to set up a page on your Website where you talk about the benefits of joining the Group and then give people the direct link to the Facebook Group.
That gives you an external website address to use in a Facebook Ad and it will also benefit you because you can use Retargeting to reconnect with people who were interested enough to click over.
Do’s and Don’ts of Facebook Groups
I’ve covered one of my biggest pet peeves in not adding people without their permission to your Facebook Group. But there are some other good lessons of Facebook Groups.
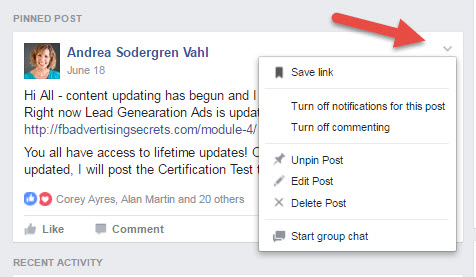
Pin Important Posts to the top of the Group
You can Pin posts to the top so that when people come into the group, that is always the post they see first. This is good for either Rules of the Group, important announcements, new happenings, etc.
Use Events and Files
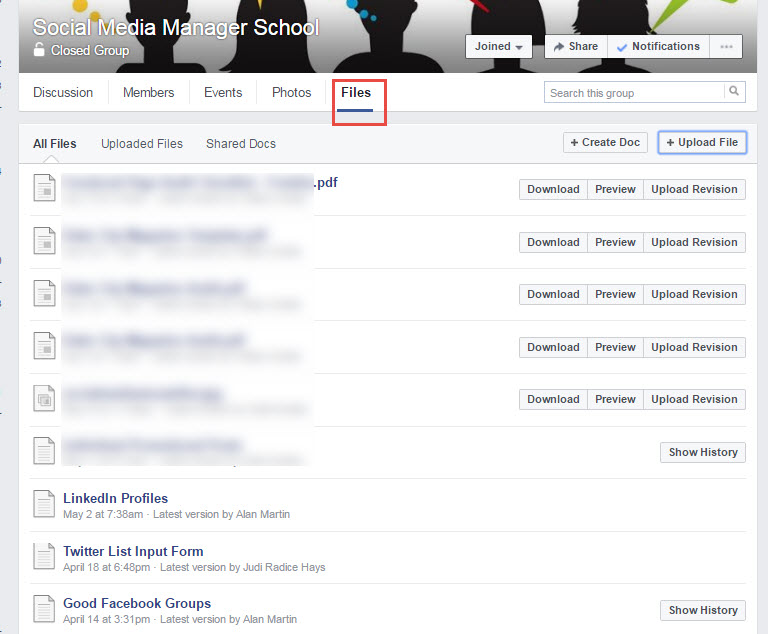
Group Events and Files can be great ways to get the word out about the Events that are pertaining just to your Group or certain reference items you want to have in a central place. You can either create a brand new Doc right in the File area (which can be edited within the Group), or Upload a file that you have on your computer (which is for download only).
Appoint a Moderator or 2 when your Group gets large
Another thing you want to make sure you do is to keep the comments and questions moderated and answered in a timely fashion. A moderator can help with this. You can either ask for volunteers (this works well when people love the group so much they want to help) or you can pay someone to moderate. A paid moderator is a good idea if this is for a paid product of yours and if the moderation job is time consuming.
Don’t let spam or bullying happen
Make sure your group is a safe and inviting place for participation. Also ask people to report any Personal Message spam – sometimes group members can privately spam members with unwanted offers so make sure someone isn’t taking advantage of your group in that way.
Make sure people know the rules
In conjunction with the previous point, let people know what your rules are around posting. Sometimes people aren’t clear on the “spam” concept – even when their blog post is helpful, a group of 400 bloggers can’t post their helpful content every day or the group will be over run with too much helpfulness.
In most of my groups, I allow links to their own content when it is in a conversation that is exactly about that topic and their post answers the person’s question. So make sure your rules are clear.
Go Live for some fun!
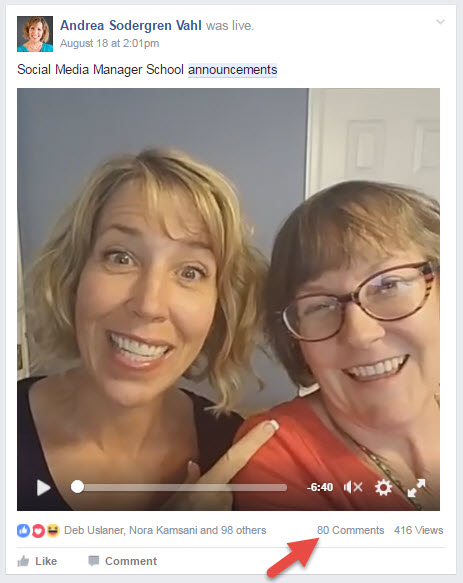
When you have an engaged community, it’s fun to do different things and mix it up. You can broadcast Live right into your group and have a discussion which is awesome. Recently Phyllis Khare and I did that for our Social Media Manager group when we were together and it was wonderful. You could also consider something more regular to connect to your community and ask questions
Facebook Groups continue to grow. I don’t think they should necessarily replace your Page since the Page is still good for advertising. But I think people will continue to get more creative about how their business participates on Facebook as Facebook continues to get creative about what they decide to show in the News Feed.
Don’t forget that you can also just network in Facebook Groups – you don’t necessarily have to create your own!
How about you, are you using Facebook Groups? What are the benefits you are seeing to your business? Share your thoughts in the comments below.









Nice info thank you for sharing.
http://www.citswebindia.in/
Very interesting Andrea! Thank you so much sharing nice info….
http://www.rationaltechnologies.com/